
Tagged as retrocomputing, amiga, gcc, linux
Written on 2026-07-20 by Daniel Kochmański
Table of Contents
- Prerequisites
- Toolchain
- Emulator
- Installation
- Running executables
- Remote debugging
- Summary
- Resources
Apropos of nothing, I decided to set up an Amiga development environment. Since figuring things out wasn't straightforward, I wrote down instructions for Linux about how to compile the first program and run it in an emulator. Enjoy!
Prerequisites
In this post I'm assuming that the reader is a proficient Linux user who can build software from source code and figure out missing dependencies. Standard build tools should be sufficient to get started. Basic understanding of shell commands is also expected. More detailed instructions on how to build the toolchain are available here: https://franke.ms/amiga/amiga-gcc.wiki.
Another rather problematic requirement is that to run AmigaOS, you need ROM images (firmware) and workbench disks (installation media). They may be bought from legal sources or dumped from owned hardware. Alternatively one could use the AROS ROM that is shipped with the emulator, although it is known to have worse compatibility with standard Amiga software.
Toolchain
To build programs for AmigaOS we need the compiler. A popular tool is amiga-gcc.
First I tried to use the default (the most battle-tested) GCC branch, but while
the produced executable worked, loading the binary in m68k-amigaos-gdb caused
a segmentation fault. After some trial and error I reported the issue and the
toolchain maintainer, Stefan 'bebbo' Franke, kindly explained that the toolchain
now produces DWARF2 debug info and then fixed a bug in embedding debug sections
in the final executable. I've finally settled on a branch amiga16.1 for GCC
and on a branch amiga-2.46 for binutils (it contains the abovementioned fix).
Note that make update may fail due to connection errors. In that case rerun it
until everything is downloaded. Both make update and make all may take some
time - on my machine everything takes about 1 hour.
export WORKSPACE=${HOME}/Workshop/AmigaOS
export TOOLCHAIN=${WORKSPACE}/amiga-gcc-toolchain
export PREFIX=${TOOLCHAIN}
mkdir -p ${WORKSPACE}
cd ${WORKSPACE}
git clone https://franke.ms/git/bebbo/amiga-gcc.git
pushd amiga-gcc
make branch branch=amiga16.1 mod=gcc
make branch branch=amiga-2.46 mod=binutils
make update
make all
# Check whether the compiler works. SDL1.2 build failed on my host, but it is
# not needed.
${TOOLCHAIN}/bin/m68k-amigaos-gcc -v
popd
Now we have a working AmigaOS toolchain. It supports a few different
runtime/libc versions. When nothing is specified it defaults to newlib.
export WORKSPACE=${HOME}/Workshop/AmigaOS
export TOOLCHAIN=${WORKSPACE}/amiga-gcc-toolchain
export PATH=${TOOLCHAIN}/bin:${PATH}
mkdir Shared
pushd Shared
cat > woosh.c <<EOF
#include <stdio.h>

void hi(void) {
  printf("jd was here \\\o/\n");
}

int main() {
  hi();
  return 0;
}
EOF
m68k-amigaos-gcc -g woosh.c -o woosh.out
file woosh.out
# woosh.out: AmigaOS loadseg()ble executable/binary
popd
Congratulations! We've just built our first AmigaOS program. It seems that
file has a bit of a problem parsing AmigaOS executables, but the binary works.
Emulator
Now how to run this file? We need two pieces:
- the emulator
- AmigaOS ROMs
Obtaining the emulator is straightforward. I picked Amiberry, because it
provides a good developer experience - built-in bsdsocket.library, virtual
hard disks and shared directories, and it works well on Linux. Another good
contender is FS-UAE. Both should work well. They have binary releases or we can
build them from source. We'll install Amiberry from Flathub:
flatpak install flathub com.blitterstudio.amiberryObtaining ROMs is a bit harder. If you own the original hardware you may already have a legal dump. Otherwise you may buy them from https://www.amigaforever.com/ or https://www.hyperion-entertainment.com/. Assuming that you have ROMs, we may start the emulator and configure our target system.
We need the following files:
- ROM file: kick.a1200.46.143
- floppies: Install314.adf, Workbench314.adf, etc
mkdir -p Amiberry/{ROMs,Floppies}
# Amiberry expects .a1200 file extension (it doesn't recognize .46.143)
cp Nero/ROMs/kick.a1200.46.143 Amiberry/ROMs/kick.a1200
cp Nero/Floppies/*.adf Amiberry/Floppies
flatpak run com.blitterstudio.amiberry
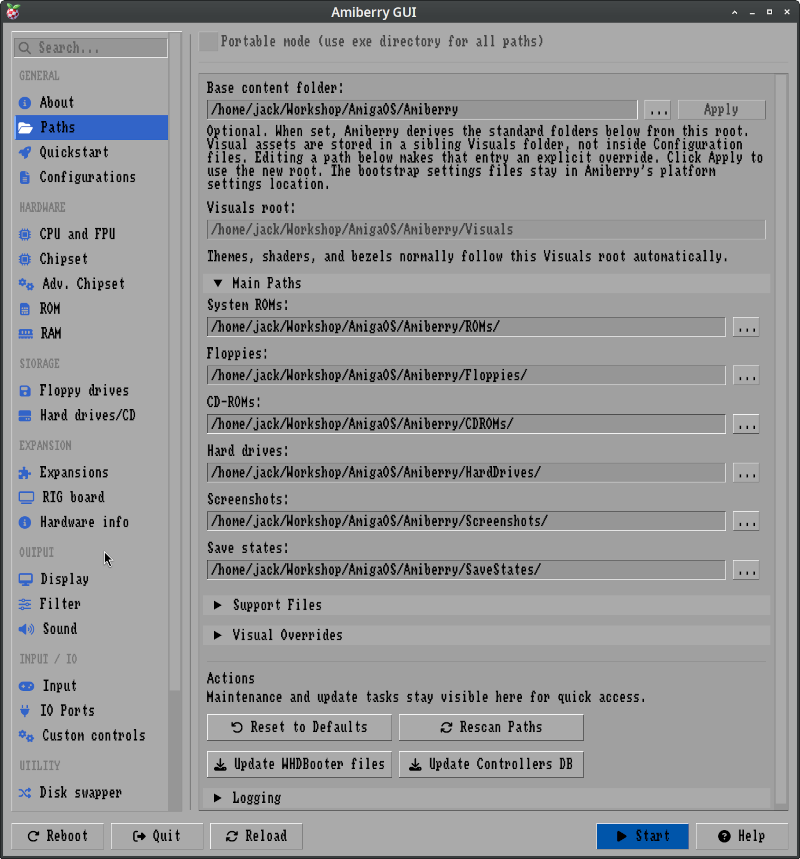
Now navigate to the "Paths" tab and configure them to point to the directory "Amiberry" that we just created. Confirm when prompted to create subdirectories. Then click the "Rescan Paths" button and go back to the "Quickstart" tab.
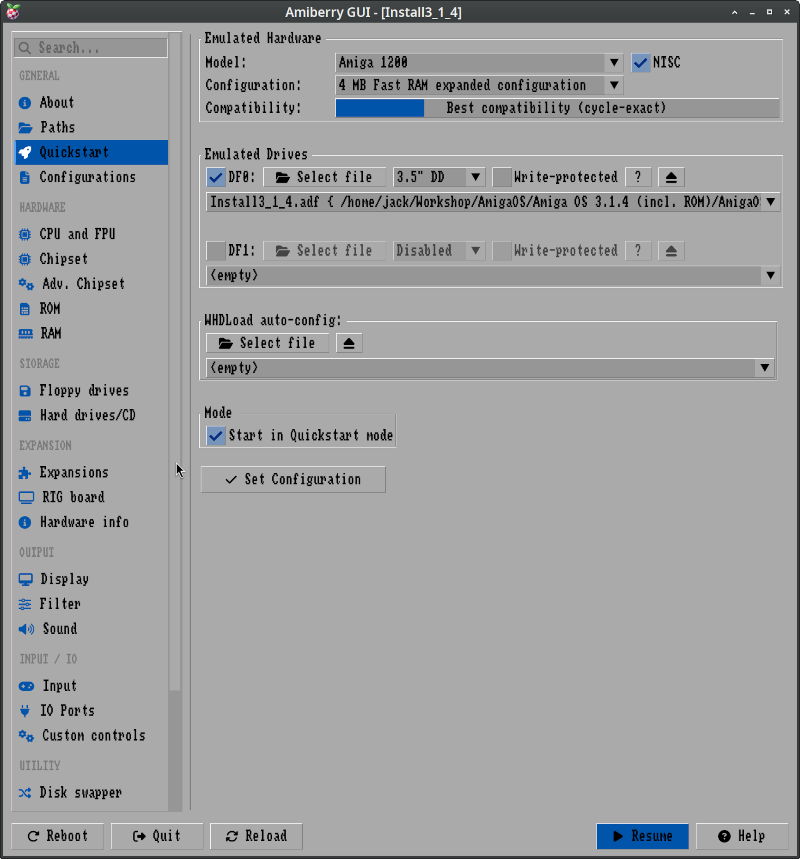
Amiga hardware has a few distinct flavors with different hardware configurations and running variations of M68K CPU. RAM is divided between the "chip memory" that is accessible directly by custom chips (graphics, audio and DMA) and "fast memory" - general-purpose RAM. The first one is usually 1-2 MB, while the latter can typically be expanded to something like 4 MB of Fast RAM. That's plenty! We will pick Amiga 1200, because it has AGA (Amiga Advanced Graphics Architecture) chipset and 4 MB Fast RAM expanded configuration.
- Model: Amiga 1200
- Configuration: 4 MB Fast RAM expanded configuration
- Emulated Drives (DF0): Install314.adf
While installing, the floppy will need to be replaced by files requested by the installer. The emulated drive DF0 represents the floppy drive. To get back to the configuration menu while the virtual machine is running, press F12.
Then navigate to the "ROM" tab and select kick.a1200 ROM as the "Main ROM File".
Then go to "Expansions" tab and enable bsdsocket.library. We'll need TCP/IP
connection later to run bgdbserver.
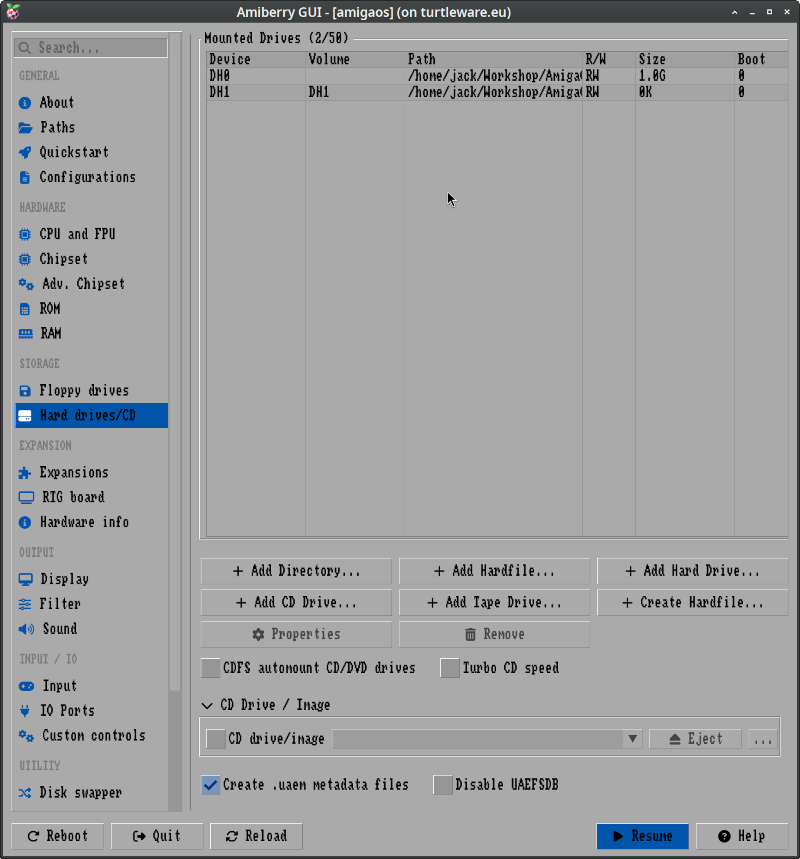
Finally add a virtual hard drive and a shared directory:
- Navigate to "Hard drives/CD" tab
- Select "Create Hardfile" :: 1024MB, RDB Mode enabled
- Select "Add Hardfile" and select the newly created file
- Select "Add Directory"
These drives will be visible in Amiga as DH0 and DH1, respectively. RDB is Amiga's native partition table format (something like MBR in PCs but richer). Setting this mode is necessary for Amiga to recognize the disk.
It is worth saving the configuration. Go to the tab "Configurations" and save the file. From now on we can start AmigaOS as:
flatpak run com.blitterstudio.amiberry -f amigaos.uaeInstallation
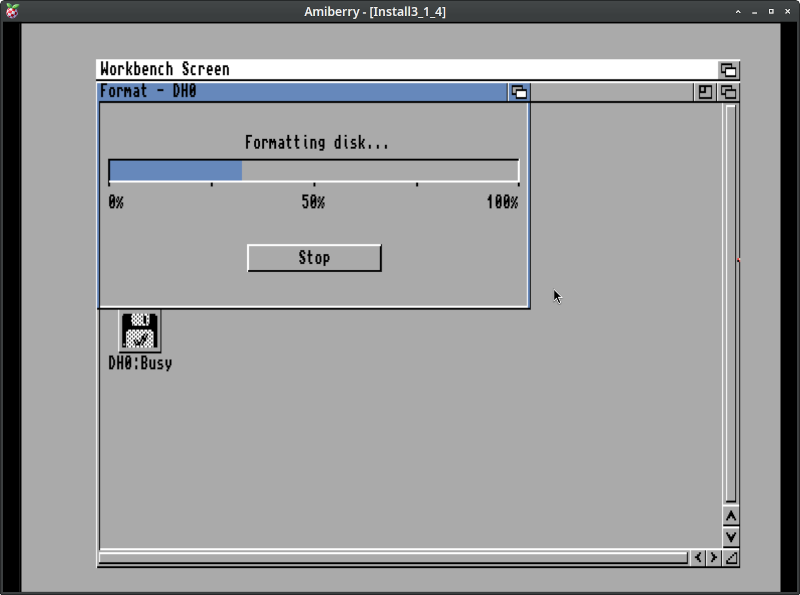
I ran into some problems with formatting the hard disk. Generally when the installer opens, the new disk should be visible in the initial directory as "DH0: …". Click on the icon with the left pointer button, then hold the right pointer button to reveal the top menu bar. Navigate to "Icons > FormatDisk" and format the disk.
Now follow steps in the installer. Sometimes we need to "insert a new floppy". To return to the Amiberry menu press F12 and swap the floppy image in DF0 with the one suggested by the installer. Then click "Resume" and carry on.
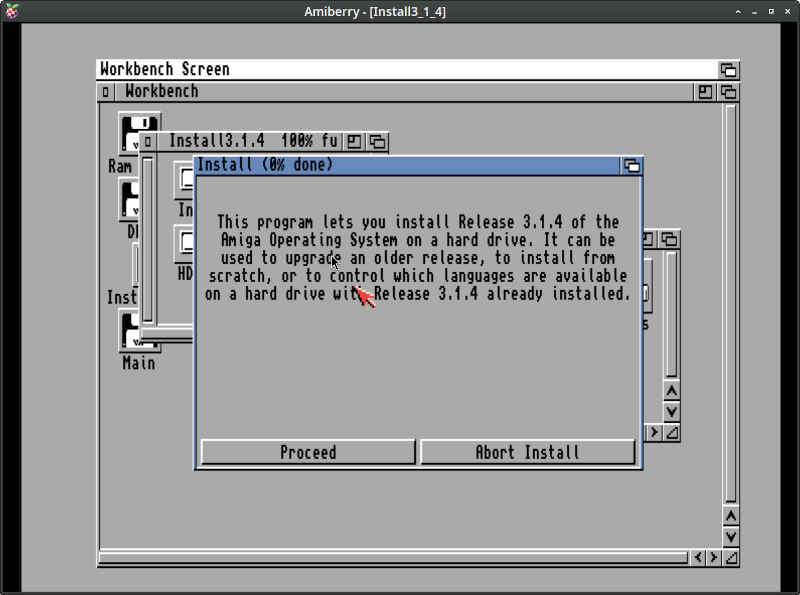
Great job, we have successfully installed AmigaOS! We may now remove the floppy disk and boot into the installed system.
Running executables
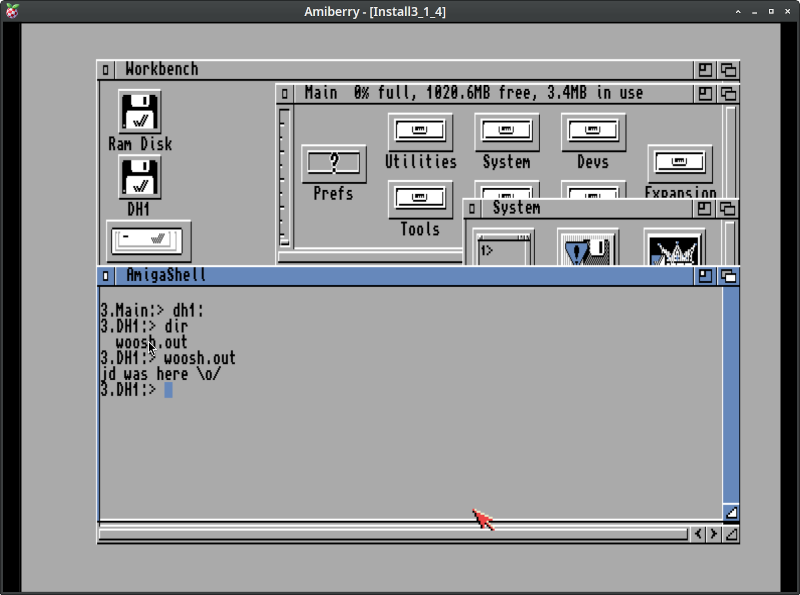
Now that the system is rebooted, go to the drive we installed the system in,
select "System" and "Shell". The binary woosh.out is already in the shared
directory which is available as "DH1", because we have added it as the second
drive (after the "Hardfile").
3.Main:> dh1:
3.DH1:> dir
  woosh.out
3.DH1:> woosh.out
jd was here \o/
3.DH1:>
That's fantastic, our cross-compiled binary works like a charm!
Remote debugging
But that's not the whole story. Software breaks, and when software breaks we
want the debugger. We've already built one with m68k-amigaos-gdb, but there is
no GDB server on the system. Stefan Franke, the maintainer of the m68k-amigaos
toolchain, also maintains bgdbserver, a port dedicated to Amiga.
Before using it, we need to install a tool to extract lha archives. It is
available here: https://aminet.net/package/util/arc/lha. Download and copy the
file lha.run in the Shared/ directory and run it inside Amiga. lha.run is
a self-extracting archive and creates a couple of files. We are interested in
the file lha_68020. Copy it to c:lha. Note that c: is not "Drive C", but
rather "Commands directory".
3.DH1:> lha.run
...
3.DH1:> copy lha_68020 c:lha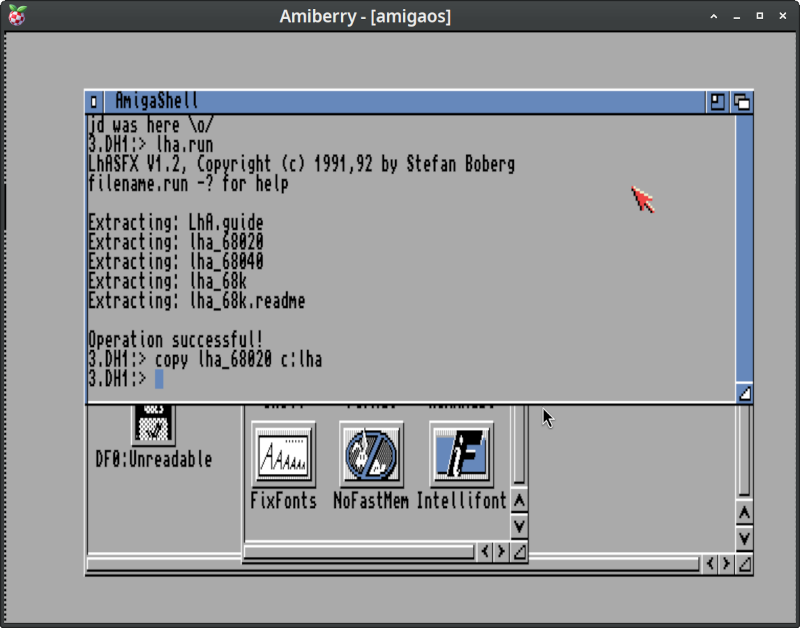
We can now remove the extracted files and download bgdbserver.lha from
https://aminet.net/dev/debug/bgdbserver.lha. Put the archive in the Shared/
directory and extract it.
3.DH1:> lha x bgdbserver.lha
3.DH1:> copy bgdbserver/bgdbserver c:
Now, finally, we can start the application in debug mode:
3.DH1:> bgdbserver :4444 woosh.out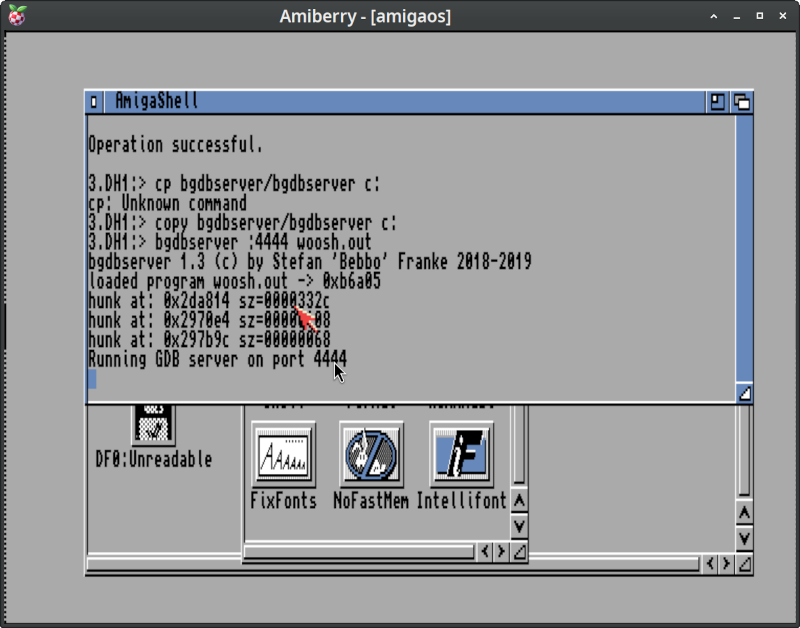
Splendid! Now we can debug our ambitious program. On the Linux host, run GDB with the same binary:
export WORKSPACE=${HOME}/Workshop/AmigaOS
export TOOLCHAIN=${WORKSPACE}/amiga-gcc-toolchain
export PATH=${TOOLCHAIN}/bin:${PATH}
m68k-amigaos-gdb
(gdb) file woosh.out
(gdb) target remote localhost:4444
(gdb) continue
If you hit a "Connection refused" error, make sure bsdsocket.library is
enabled in Amiberry configuration (as mentioned earlier).
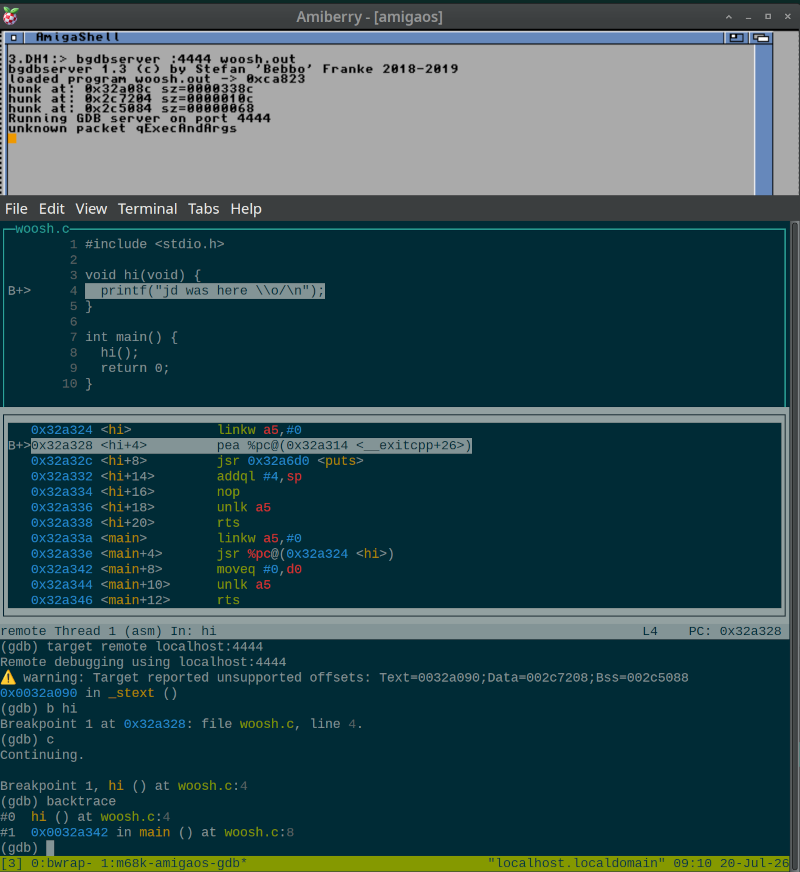
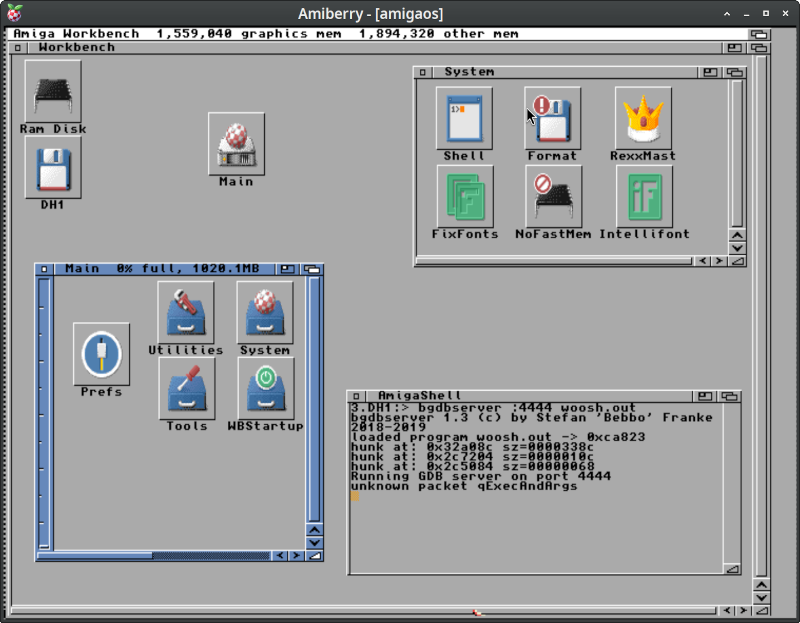
The next logical step is to make AmigaOS pretty, but it is outside of the scope of this tutorial. I followed this guide that covers the topic in detail: https://lyonsden.net/installing-amiga-os-3-1-4-part-5-finishing-touches/
Summary
We've successfully built and installed the development environment for AmigaOS. I wonder what a motivated Lisp hacker could do with it?
Resources
While configuring this setup, I've primarily learned from these resources:
- https://franke.ms/amiga/amiga-gcc.wiki: toolchain homepage
- https://github.com/BlitterStudio/amiberry/wiki: emulator wiki
- https://guide.abime.net/wb3.1/chap2.htm: partitioning guide
- https://guide.abime.net/wb3.1/chap4.htm: installing lha.run
- https://aminet.net/: package repository
- https://lyonsden.net/installing-amiga-os-3-1-4-part-5-finishing-touches/: a detailed guide explaining how to make AmigaOS look pretty
0 Comments
Log in to join the conversation.No comments yet. Be the first to share your thoughts.