
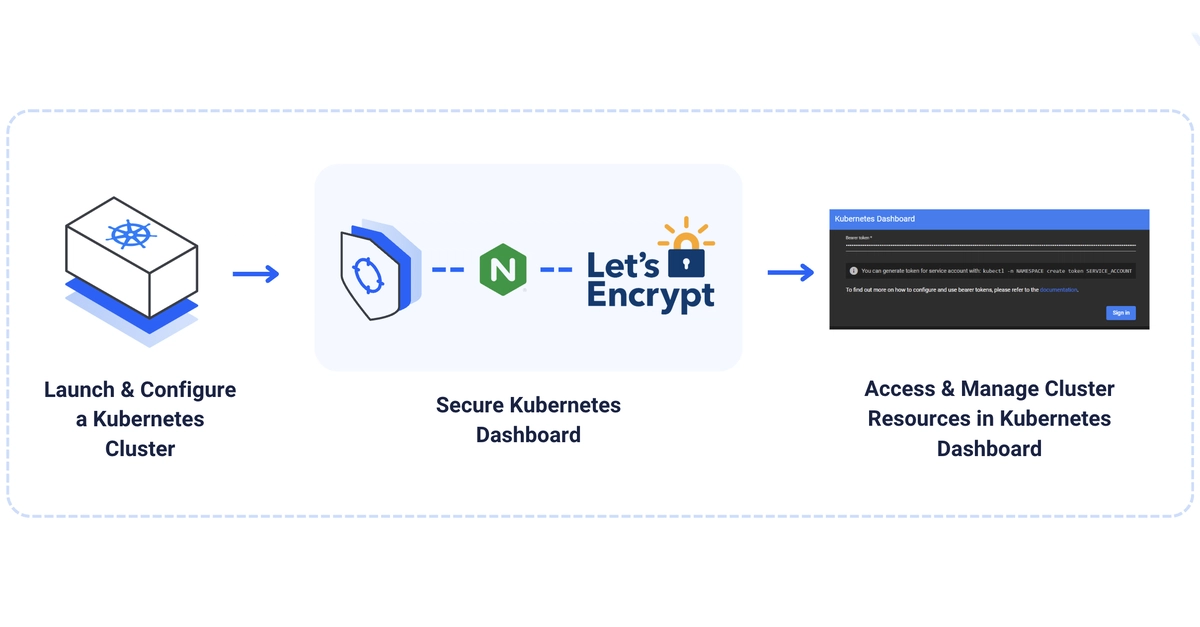
Kubernetes Dashboard is an open-source web GUI for managing cluster resources (CronJobs, DaemonSets, Deployments, Pods, ReplicaSets, StatefulSets) deploying apps, and monitoring cluster health in real time. This guide installs it via Helm, sets up admin and read-only RBAC access, secures it behind Nginx Ingress with cert-manager TLS, and deploys a sample app from the UI.
Prerequisites: a Kubernetes cluster with kubectl configured, and Helm installed on your workstation.
Install the Dashboard
$ helm repo add kubernetes-dashboard https://kubernetes.github.io/dashboard/
$ helm repo update
$ helm install kubernetes-dashboard kubernetes-dashboard/kubernetes-dashboard --create-namespace --namespace kubernetes-dashboard
$ kubectl get all -n kubernetes-dashboard
Enter fullscreen mode Exit fullscreen mode
Confirm pods, services, and replicasets are up.
Configure Access
The Dashboard authenticates via bearer tokens tied to a ServiceAccount.
1. Create an admin service account:
$ nano dashboard-admin-user.yml
Enter fullscreen mode Exit fullscreen mode
apiVersion: v1
kind: ServiceAccount
metadata:
  name: dashboard-admin-user
  namespace: kubernetes-dashboard
---
apiVersion: rbac.authorization.k8s.io/v1
kind: ClusterRoleBinding
metadata:
  name: dashboard-admin-user
roleRef:
  apiGroup: rbac.authorization.k8s.io
  kind: ClusterRole
  name: cluster-admin
subjects:
- kind: ServiceAccount
  name: dashboard-admin-user
  namespace: kubernetes-dashboard
Enter fullscreen mode Exit fullscreen mode
This binds to cluster-admin — full control over the cluster. Use a scoped Role/ClusterRole instead for production.
$ kubectl apply -f dashboard-admin-user.yml
$ kubectl -n kubernetes-dashboard create token dashboard-admin-user
Enter fullscreen mode Exit fullscreen mode
Save the printed token — you'll use it to log in.
2. Optional — a read-only user for monitoring-only access:
$ nano read-only-user.yml
Enter fullscreen mode Exit fullscreen mode
apiVersion: v1
kind: ServiceAccount
metadata:
  name: read-only-user
  namespace: kubernetes-dashboard
---
apiVersion: rbac.authorization.k8s.io/v1
kind: ClusterRole
metadata:
  name: read-only-clusterrole
rules:
- apiGroups: ["", "apps", "extensions"]
  resources: ["*"]
  verbs: ["get", "list", "watch"]
---
apiVersion: rbac.authorization.k8s.io/v1
kind: ClusterRoleBinding
metadata:
  name: read-only-binding
roleRef:
  apiGroup: rbac.authorization.k8s.io
  kind: ClusterRole
  name: read-only-clusterrole
subjects:
- kind: ServiceAccount
  name: read-only-user
  namespace: kubernetes-dashboard
Enter fullscreen mode Exit fullscreen mode
$ kubectl apply -f read-only-user.yml
$ kubectl -n kubernetes-dashboard create token read-only-user
Enter fullscreen mode Exit fullscreen mode
Access via Port Forwarding
1. Forward the Dashboard's HTTPS endpoint:
$ kubectl port-forward service/kubernetes-dashboard-kong-proxy 8443:443 -n kubernetes-dashboard
Enter fullscreen mode Exit fullscreen mode
2. On a remote workstation, open the firewall and bind to all interfaces:
$ sudo ufw allow 8443/tcp
$ sudo ufw reload
$ kubectl port-forward service/kubernetes-dashboard-kong-proxy 8443:443 -n kubernetes-dashboard --address='0.0.0.0'
Enter fullscreen mode Exit fullscreen mode
3. Visit https://127.0.0.1:8443 (or https://<server-ip>:8443), accept the self-signed cert warning, paste your admin token, and sign in. From the UI you can switch namespaces (top nav) and check Nodes under Cluster for resource usage.
Secure It with Ingress + TLS
Exposing the Dashboard on a public endpoint via --address=0.0.0.0 is fine for testing but not production — put it behind Ingress with a real TLS certificate instead.
1. Stop port forwarding (Ctrl+C), then install Nginx Ingress:
$ helm repo add ingress-nginx https://kubernetes.github.io/ingress-nginx
$ helm repo update
$ helm install ingress-nginx ingress-nginx/ingress-nginx \
--namespace ingress-nginx \
--create-namespace
$ kubectl get services -n ingress-nginx
Enter fullscreen mode Exit fullscreen mode
Point your domain's DNS at the resulting EXTERNAL-IP.
2. Install cert-manager:
$ helm repo add jetstack https://charts.jetstack.io
$ helm repo update
$ helm install cert-manager jetstack/cert-manager \
  --namespace cert-manager \
  --create-namespace \
  --set crds.enabled=true
$ kubectl get all -n cert-manager
Enter fullscreen mode Exit fullscreen mode
3. Create a ClusterIssuer:
$ nano issuer.yml
Enter fullscreen mode Exit fullscreen mode
apiVersion: cert-manager.io/v1
kind: ClusterIssuer
metadata:
  name: tls-certificate-issuer
spec:
  acme:
    server: https://acme-v02.api.letsencrypt.org/directory
    email: [email protected]
    privateKeySecretRef:
      name: letsencrypt-private-key
    solvers:
      - http01:
          ingress:
            ingressClassName: nginx
Enter fullscreen mode Exit fullscreen mode
$ kubectl apply -f issuer.yml
$ kubectl get clusterissuer
Enter fullscreen mode Exit fullscreen mode
4. Patch the Ingress controller so cert-manager's HTTP-01 challenge isn't blocked by strict path validation:
$ kubectl patch configmap ingress-nginx-controller -n ingress-nginx --patch '{"data":{"strict-validate-path-type":"false"}}'
Enter fullscreen mode Exit fullscreen mode
5. Create the Dashboard Ingress. Replace dashboard.example.com:
$ nano dashboard-ingress.yml
Enter fullscreen mode Exit fullscreen mode
apiVersion: networking.k8s.io/v1
kind: Ingress
metadata:
  name: kubernetes-dashboard-ingress
  namespace: kubernetes-dashboard
  annotations:
    cert-manager.io/cluster-issuer: tls-certificate-issuer
    nginx.ingress.kubernetes.io/backend-protocol: "HTTPS"
spec:
  ingressClassName: nginx
  tls:
    - hosts:
        - dashboard.example.com
      secretName: kubernetes-dashboard-cert
  rules:
    - host: dashboard.example.com
      http:
        paths:
          - path: /
            pathType: Prefix
            backend:
              service:
                name: kubernetes-dashboard-kong-proxy
                port:
                  number: 443
Enter fullscreen mode Exit fullscreen mode
$ kubectl apply -f dashboard-ingress.yml
$ kubectl get certificate -n kubernetes-dashboard
$ kubectl get ingress -n kubernetes-dashboard
Enter fullscreen mode Exit fullscreen mode
Visit https://dashboard.example.com once the certificate flips to True.
Deploy an App from the Dashboard
1. Point a subdomain (e.g. sample-app.example.com) at the Ingress controller's external IP.
2. In the Dashboard, click + → Create from form:
-
App name:
sample-app -
Container Image:
nginxdemos/hello - Service: Internal, port 80, target port 80
-
Namespace:
default
Click Deploy, then check Workloads → Pods and Services to confirm it's running.
3. Add an Ingress via Create from input:
apiVersion: networking.k8s.io/v1
kind: Ingress
metadata:
  name: sample-app-ingress
  annotations:
    cert-manager.io/cluster-issuer: tls-certificate-issuer
spec:
  ingressClassName: nginx
  tls:
    - hosts:
        - sample-app.example.com
      secretName: sample-app-cert
  rules:
    - host: sample-app.example.com
      http:
        paths:
          - path: /
            pathType: Prefix
            backend:
              service:
                name: sample-app
                port:
                  number: 80
Enter fullscreen mode Exit fullscreen mode
Upload it, confirm it under Ingresses, then visit https://sample-app.example.com. You should see the sample app, with Auto Refresh showing traffic load-balanced across pods.
Next Steps
Kubernetes Dashboard is running with RBAC-scoped access and TLS via Ingress. From here:
- Swap the
cluster-adminbinding for a scoped role once you've validated the workflow - Use the read-only token for team members who only need visibility
- Deploy production workloads through the same Ingress + cert-manager pattern established here
For the full guide, visit the original article on Vultr Docs.
0 Comments
Log in to join the conversation.No comments yet. Be the first to share your thoughts.