
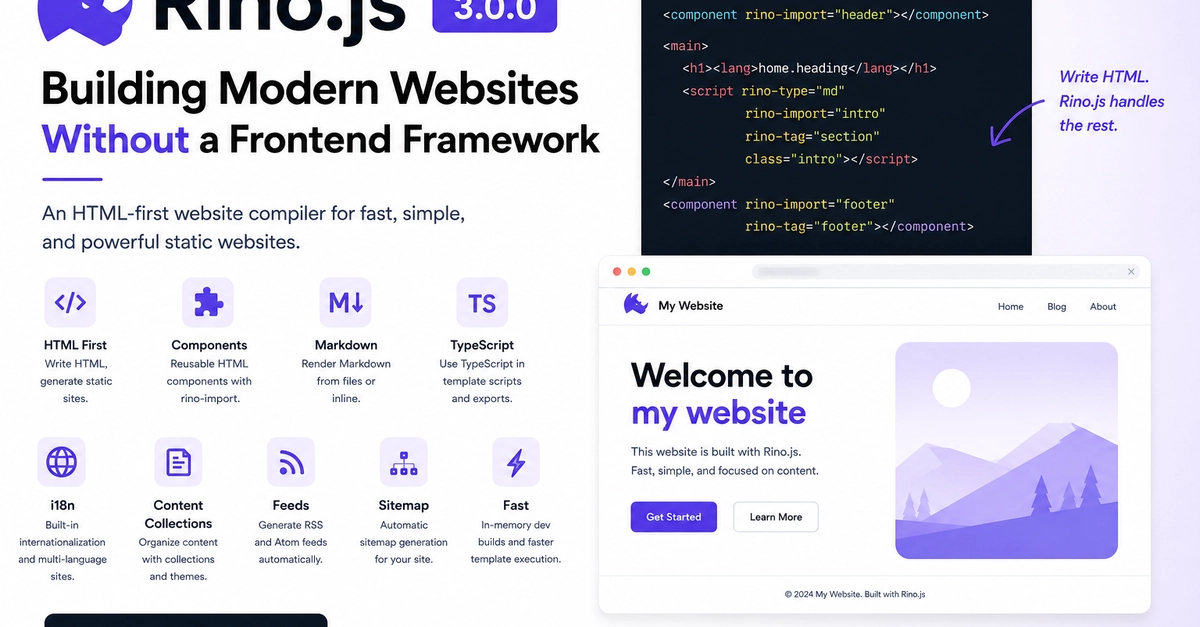
Modern web development has become incredibly powerful. But also increasingly complicated.
Many projects begin by installing hundreds of megabytes of dependencies before writing a single page. Frameworks, bundlers, routers, templating systems, CSS tooling, and runtime libraries all solve important problems, but they also introduce additional complexity.
I wanted something different.
I wanted to build websites that start with plain HTML, while still providing the features developers expect today:
- Reusable components
- Markdown support
- TypeScript
- CSS and JavaScript bundling
- Internationalization (i18n)
- Content collections
- RSS/Atom feeds
- Sitemap generation
- Fast development builds
That idea became Rino.js.
What is Rino.js?
Rino.js is an HTML-first website compiler for building static websites, documentation, blogs, portfolios, company websites, and other content driven projects.
Instead of introducing a custom templating language or requiring a frontend framework, Rino.js treats HTML as the primary language. Pages remain valid HTML while additional functionality is added through a small set of build-time conventions.
The goal is simple:
Write HTML. Generate optimized static websites.
Why HTML First?
HTML has existed for decades, yet modern web development often treats it as something generated by another language.
Rino.js takes the opposite approach.
Instead of writing components in JSX or another template language, components are simply HTML files.
<component rino-import="header"></component>
Enter fullscreen mode Exit fullscreen mode
That's all it takes.
The compiler replaces the component during the build, producing plain static HTML with no runtime dependency.
Starting Rino.js
Rino.js has a command that is designed to provide default project.
npm create rino@latest
Enter fullscreen mode Exit fullscreen mode
Project Shape
A Rino.js project usually looks like this:
my-site/
  rino-config.js
  dev.js
  generate.js
  feed.js
  sitemap.js
  backoffice.js
  pages/
    index.html
    about.html
  components/
    header.html
    footer.html
  public/
    images/
      photo.webp
  scripts/
    export/
      app.js
      dashboard.ts
  styles/
    export/
      site.css
  mds/
    intro.md
  contents/
    en/
      blog/
        1-first-post.md
  content-theme/
    en/
      content.html
      content-list.html
  i18n/
    en/
      index.json
    ko/
      index.json
Enter fullscreen mode Exit fullscreen mode
Only the folders you need are required. For a small static site, pages/, components/, public/, scripts/export/, and styles/export/ may be enough.
Configuration
The project configuration lives in rino-config.js.
export default {
  dist: "./dist",
  port: 3000,
  site: {
    url: "https://example.com",
  },
  sitemap: ["https://example.com/custom-page"],
  i18n: {
    defaultLocale: "en",
    locales: ["en", "ko"],
  },
};
Enter fullscreen mode Exit fullscreen mode
dist controls the output folder, port controls the development server, site.url is used for sitemap and feeds, sitemap adds extra URLs, and i18n controls localized page generation.
Pages
Files in pages/ become HTML files in the output.
pages/index.html        -> dist/index.html
pages/about.html        -> dist/about.html
pages/blog/index.html   -> dist/blog/index.html
Enter fullscreen mode Exit fullscreen mode
A page is normal HTML with optional Rino syntax:
<!doctype html>
<html>
  <head>
    <title><lang>site.title</lang></title>
    <link rel="stylesheet" href="/styles/site.css" />
    <script src="/scripts/app.js"></script>
  </head>
  <body>
    <component rino-import="header"></component>

    <main>
      <h1><lang>home.heading</lang></h1>
      <script rino-type="md" rino-import="intro" rino-tag="section"></script>
    </main>

    <component rino-import="footer" rino-tag="footer"></component>
  </body>
</html>
Enter fullscreen mode Exit fullscreen mode
Components
Components live in components/. Use <component> to render one inside a page or another component.
<component rino-import="header"></component>
Enter fullscreen mode Exit fullscreen mode
This loads:
components/header.html
Enter fullscreen mode Exit fullscreen mode
Nested component paths are supported:
<component rino-import="layout/sidebar"></component>
Enter fullscreen mode Exit fullscreen mode
This loads:
components/layout/sidebar.html
Enter fullscreen mode Exit fullscreen mode
Use rino-tag when you want to wrap the component output in an element and pass attributes to that wrapper.
<component
  rino-import="button"
  rino-tag="button"
  type="button"
  class="button"
  onclick="alert('Hello')"
></component>
Enter fullscreen mode Exit fullscreen mode
If components/button.html contains:
Click me
Enter fullscreen mode Exit fullscreen mode
The generated HTML becomes:
<button type="button" class="button" onclick="alert('Hello')">Click me</button>
Enter fullscreen mode Exit fullscreen mode
In version 3, use rino-import. The older rino-path syntax is not supported.
Markdown
Rino.js can render Markdown snippets from mds/.
mds/intro.md
Enter fullscreen mode Exit fullscreen mode
<script rino-type="md" rino-import="intro" rino-tag="section" class="intro"></script>
Enter fullscreen mode Exit fullscreen mode
That renders mds/intro.md inside a <section>.
You can also write Markdown inline:
<script rino-type="markdown" rino-tag="article" type="text/markdown">
  ## Hello from Markdown

  This content is rendered during the build.
</script>
Enter fullscreen mode Exit fullscreen mode
Supported Markdown types are md and markdown.
Template Scripts
Template scripts run during generation. They print HTML into the generated page with console.log.
JavaScript template script:
<script rino-type="js" type="text/javascript">
  console.log("<ul>");
  for (const item of ["Home", "Blog", "About"]) {
    console.log(`<li>${item}</li>`);
  }
  console.log("</ul>");
</script>
Enter fullscreen mode Exit fullscreen mode
TypeScript template script:
<script rino-type="ts" type="text/typescript">
  const message: string = "Generated with TypeScript";
  console.log(`<p>${message}</p>`);
</script>
Enter fullscreen mode Exit fullscreen mode
Template scripts can use Node.js imports:
<script rino-type="js" type="text/javascript">
  import os from "os";
  console.log(`<p>Built on ${os.type()}</p>`);
</script>
Enter fullscreen mode Exit fullscreen mode
In version 3, template execution is faster because Rino.js reuses an isolated child-process runner instead of creating a new process for every template script tag.
Browser Scripts
Browser scripts are normal browser JavaScript. Put source files in scripts/export/.
scripts/export/app.js -> dist/scripts/app.js
scripts/export/app.ts -> dist/scripts/app.js
Enter fullscreen mode Exit fullscreen mode
Reference the generated file from HTML:
<script src="/scripts/app.js"></script>
Enter fullscreen mode Exit fullscreen mode
Example JavaScript:
document.querySelector("button")?.addEventListener("click", () => {
  console.log("Clicked");
});
Enter fullscreen mode Exit fullscreen mode
Example TypeScript:
const button = document.querySelector<HTMLButtonElement>("button");

button?.addEventListener("click", () => {
  console.log("Clicked with TypeScript");
});
Enter fullscreen mode Exit fullscreen mode
Rino.js bundles scripts and minifies the output. Minification is useful for smaller files.
CSS
Put CSS files in styles/export/.
styles/export/site.css -> dist/styles/site.css
Enter fullscreen mode Exit fullscreen mode
@import "../theme.css";

body {
  font-family: system-ui, sans-serif;
}
Enter fullscreen mode Exit fullscreen mode
Reference the generated CSS:
<link rel="stylesheet" href="/styles/site.css" />
Enter fullscreen mode Exit fullscreen mode
Rino.js resolves local CSS imports, skips circular imports, skips URL imports, and minifies CSS output.
Public Assets
Files in public/ are copied to the output root.
public/favicon.ico       -> dist/favicon.ico
public/images/photo.webp -> dist/images/photo.webp
Enter fullscreen mode Exit fullscreen mode
Use root-relative paths:
<img src="/images/photo.webp" alt="Photo" />
<link rel="icon" href="/favicon.ico" />
Enter fullscreen mode Exit fullscreen mode
Inline style, javascript and typescript Exports
rino-export lets a page or component keep related CSS and javascript close to its HTML while still generating external files.
Exported tags are removed from final HTML and written to generated assets.
CSS Export
<section class="callout">
  <h2>Hello</h2>
</section>

<style rino-export="/site.css">
  .callout {
    border: 1px solid #ddd;
    padding: 1rem;
  }
</style>
Enter fullscreen mode Exit fullscreen mode
This writes:
dist/styles/site.css
Enter fullscreen mode Exit fullscreen mode
JavaScript Export
<script rino-export="/site.js">
  console.log("Exported browser script");

  window.openMenu = function () {
    document.body.classList.toggle("menu-open");
  };
</script>
Enter fullscreen mode Exit fullscreen mode
This writes:
dist/scripts/site.js
Enter fullscreen mode Exit fullscreen mode
TypeScript Export
<script rino-export="/site.ts" type="text/typescript">
  const message: string = "Exported TypeScript";
  console.log(message);
</script>
Enter fullscreen mode Exit fullscreen mode
This writes JavaScript:
dist/scripts/site.js
Enter fullscreen mode Exit fullscreen mode
If code outside the bundle needs to call a function, attach it to window.
<script rino-export="/site.ts" type="text/typescript">
  (window as any).testExportTypescript = function (): void {
    console.log("Called from outside");
  };
</script>
Enter fullscreen mode Exit fullscreen mode
Then call it from HTML:
<button onclick="window.testExportTypescript()">Run</button>
Enter fullscreen mode Exit fullscreen mode
Multiple tags can export to the same file. Rino.js appends unique blocks and ignores exact duplicate blocks.
i18n
Use <lang> tags in pages and components:
<h1><lang>name</lang></h1>
<p><lang>body.hero.copy</lang></p>
<p><lang>items[0].title</lang></p>
Enter fullscreen mode Exit fullscreen mode
Create matching JSON files in i18n/{locale}/.
pages/index.html
i18n/en/index.json
i18n/ko/index.json
Enter fullscreen mode Exit fullscreen mode
Example of i18n/en/index.json:
{
  "name": "Rino.js",
  "body": {
    "hero": {
      "copy": "Simple static websites from HTML."
    }
  },
  "items": [
    {
      "title": "First item"
    }
  ]
}
Enter fullscreen mode Exit fullscreen mode
The default locale is generated at the normal page path. Other locales are generated under their locale prefix, such as /ko/index.html.
Missing keys remain in the HTML instead of breaking the build. To keep a literal language tag, escape it:
\<lang>name\</lang>
Enter fullscreen mode Exit fullscreen mode
Content Collections
Rino.js can build Markdown content collections such as blogs.
contents/en/blog/1-first-post.md
Enter fullscreen mode Exit fullscreen mode
Markdown content can start with JSON metadata inside an HTML comment:
<!--
{
  "title": "Welcome to the Blog",
  "time": "2026-07-29T00:00:00.000Z",
  "description": "The first post on our Rino.js blog."
}
-->

# Hello World

This is the first post.
Enter fullscreen mode Exit fullscreen mode
This generates:
dist/contents/en/blog/1-first-post.html
Enter fullscreen mode Exit fullscreen mode
The matching template lives at:
content-theme/en/content.html
Enter fullscreen mode Exit fullscreen mode
Example content template:
<!doctype html>
<html lang="en">
  <head>
    <title>{{ content.title }}</title>
  </head>
  <body>
    <main>
      <h1>{{ content.title }}</h1>
      <p>{{ content.time }}</p>
      <article>{{ content.body }}</article>
    </main>
  </body>
</html>
Enter fullscreen mode Exit fullscreen mode
You can access metadata and generated fields:
{{ content.title }}
{{ content.description }}
{{ content.body }}
{{ content.urlPath }}
{{ content.nearby[0].title }}
Enter fullscreen mode Exit fullscreen mode
For loops, use a template script:
<script rino-type="js" type="text/javascript">
  const args = process.argv;
  const content = JSON.parse(args[args.length - 1]);

  console.log("<ul>");
  for (const post of content.nearby || []) {
    console.log(`<li><a href="${post.link}">${post.title}</a></li>`);
  }
  console.log("</ul>");
</script>
Enter fullscreen mode Exit fullscreen mode
Content Lists
Content list templates live next to content templates:
content-theme/en/content-list.html
Enter fullscreen mode Exit fullscreen mode
Rino.js creates paginated list pages for each category:
dist/contents-list/en/blog/blog-1.html
Enter fullscreen mode Exit fullscreen mode
Example:
<ol>
  <script rino-type="js" type="text/javascript">
    const args = process.argv;
    const data = JSON.parse(args[args.length - 1]);

    for (const item of data.contentList) {
      console.log(`<li><a href="${item.link}">${item.title}</a></li>`);
    }
  </script>
</ol>
Enter fullscreen mode Exit fullscreen mode
Available data includes:
{{ contentList[0].title }}
{{ pagination.prevLink }}
{{ pagination.nextLink }}
Enter fullscreen mode Exit fullscreen mode
Template scripts are usually the better option for rendering arrays.
Sitemap and Feeds
Rino.js can generate a sitemap from pages, localized pages, content pages, and extra config URLs.
import { generateProjectSitemapFile } from "rinojs";
import config from "./rino-config.js";

await generateProjectSitemapFile(process.cwd(), config);
Enter fullscreen mode Exit fullscreen mode
It can also generate RSS and Atom feeds from contents/.
import { generateProjectFeedFiles } from "rinojs";
import config from "./rino-config.js";

await generateProjectFeedFiles(process.cwd(), config);
Enter fullscreen mode Exit fullscreen mode
Typical outputs:
dist/sitemap.xml
dist/rss.xml
dist/atom.xml
dist/rss-en.xml
dist/atom-en.xml
Enter fullscreen mode Exit fullscreen mode
My Goal
Rather than building another frontend framework, I wanted to explore how far plain HTML could go with a lightweight compiler.
The result is a workflow that keeps HTML at the center while adding practical build-time features when they're needed.
Version 3 is a major milestone, but it's only the beginning. There are many ideas for future releases, and I'm looking forward to continuing to improve the project based on real world use.
0 Comments
Log in to join the conversation.No comments yet. Be the first to share your thoughts.