
Introduction
Containers provide a consistent way to package applications together with the dependencies and configuration required to run them.
A Dockerfile defines how that container image is built.
In this project, a Node.js application was containerized using a custom Dockerfile, with the image built, tested, inspected, modified, and rebuilt throughout the implementation.
The project demonstrates how Dockerfile instructions influence the resulting image and, ultimately, the behavior of the running container.
What Is a Dockerfile?
A Dockerfile is a text file containing a sequence of instructions Docker uses to build an image.
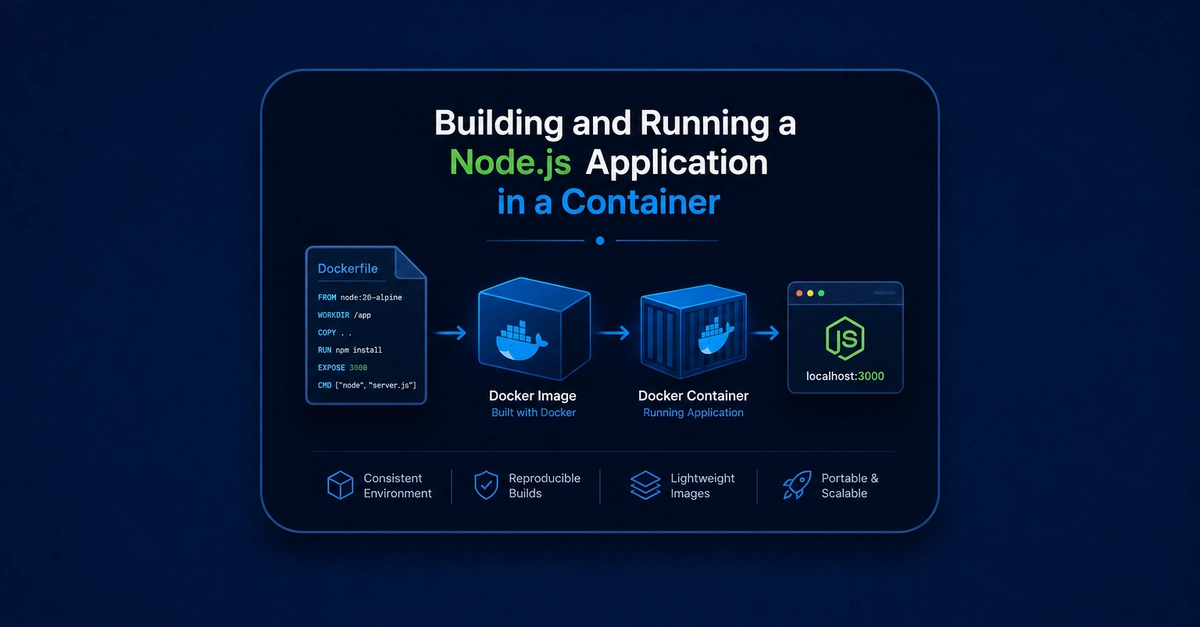
A simplified workflow looks like this:
Application Source Code
        │
        ▼
    Dockerfile
        │
        │ docker build
        ▼
   Docker Image
        │
        │ docker run
        ▼
 Docker Container
        │
        ▼
 Running Application
Enter fullscreen mode Exit fullscreen mode
The Dockerfile describes the environment and instructions required to turn application source code into a runnable container image.
Dockerfile vs Docker Image vs Container
These three concepts are closely related but serve different purposes.
Dockerfile
The Dockerfile is the build blueprint.
It defines instructions such as:
FROM
WORKDIR
COPY
RUN
EXPOSE
CMD
Enter fullscreen mode Exit fullscreen mode
Docker Image
The image is the built artifact produced from the Dockerfile.
It contains the application, dependencies, filesystem layers, and configuration required to create a container.
Docker Container
The container is a running instance of an image.
In simple terms:
Dockerfile
    │
    │ docker build
    ▼
Docker Image
    │
    │ docker run
    ▼
Docker Container
Enter fullscreen mode Exit fullscreen mode
Project Overview
The application used for this project is a simple Node.js web application.
The containerized application consists of:
- A Node.js application
- A
server.jsentry point - A
package.jsonfile - Installed Node.js dependencies
- A Dockerfile defining the image build process
The Dockerfile is responsible for packaging these components into a reproducible container image.
Project Structure
Dockerfiles-lab/
├── screenshots/
├── .gitignore
├── Dockerfile
├── package.json
├── package-lock.json
├── README.md
└── server.js
Enter fullscreen mode Exit fullscreen mode
The repository also contains implementation screenshots documenting the different stages of the Dockerfile and container lifecycle.
The complete implementation is available in the GitHub repository linked at the end of this article.
The Node.js Application
Before building the container, there needs to be an application for Docker to package.
The application entry point is:
server.js
Enter fullscreen mode Exit fullscreen mode
A simplified Node.js server can look like:
const http = require("http");

const server = http.createServer((req, res) => {
  res.writeHead(200, { "Content-Type": "text/plain" });
  res.end("Hello from Docker!");
});

server.listen(3000, () => {
  console.log("Server running on port 3000");
});
Enter fullscreen mode Exit fullscreen mode
The application listens on port 3000.
This gives Docker something concrete to package and run inside the container.
Why package.json Matters
The project also contains:
package.json
Enter fullscreen mode Exit fullscreen mode
For Node.js applications, package.json provides project metadata and dependency information.
It can also define scripts used to start or manage the application.
For example:
{
  "scripts": {
    "start": "node server.js"
  }
}
Enter fullscreen mode Exit fullscreen mode
The associated lock file:
package-lock.json
Enter fullscreen mode Exit fullscreen mode
records the resolved dependency versions.
Together, these files make the Node.js application's dependencies and runtime configuration reproducible.
Building the First Docker Image
The first stage of the implementation involved building a Docker image from the Dockerfile.
The basic command is:
docker build -t docker-node-app:1.0 .
Enter fullscreen mode Exit fullscreen mode
The components of the command are:
docker build
     │
     ├── -t docker-node-app:1.0
     │       └── image name and tag
     │
     └── .
         └── current directory as build context
Enter fullscreen mode Exit fullscreen mode
The . tells Docker to use the current directory as the build context.
This makes files in the project directory available to Docker during the build, subject to .dockerignore rules where applicable.
Understanding the Dockerfile
A Dockerfile is processed from top to bottom.
A typical Node.js Dockerfile can contain instructions such as:
FROM node:20-alpine

WORKDIR /app

COPY package*.json ./

RUN npm install

COPY . .

EXPOSE 3000

CMD ["node", "server.js"]
Enter fullscreen mode Exit fullscreen mode
Each instruction has a specific purpose.
FROM: Choosing the Base Image
FROM node:20-alpine
Enter fullscreen mode Exit fullscreen mode
FROM specifies the base image from which the new image is built.
For a Node.js application, using a Node.js base image provides the Node.js runtime and supporting environment required to execute the application.
The alpine variant is based on Alpine Linux and is commonly used when a smaller image footprint is desirable.
The base image is therefore the starting point for the container environment.
WORKDIR: Setting the Working Directory
WORKDIR /app
Enter fullscreen mode Exit fullscreen mode
WORKDIR establishes the working directory for subsequent Dockerfile instructions.
Instead of placing application files throughout the container filesystem, the application can be organized under:
/app
Enter fullscreen mode Exit fullscreen mode
It also determines the default working directory when the container starts unless another directory is explicitly configured.
COPY: Adding Application Files
The application files need to be transferred from the build context into the image.
For example:
COPY package*.json ./
Enter fullscreen mode Exit fullscreen mode
This copies the Node.js package definition files into the working directory.
Later:
COPY . .
Enter fullscreen mode Exit fullscreen mode
copies the remaining application files into the image.
This separation is useful because dependency installation and application source code can be handled as separate build layers.
RUN: Installing Dependencies
RUN npm install
Enter fullscreen mode Exit fullscreen mode
RUN executes a command while the image is being built.
Here, npm installs the dependencies defined by the Node.js project.
The resulting files become part of the image layer produced by this instruction.
This is different from CMD.
RUN happens during image build time.
EXPOSE: Documenting the Application Port
EXPOSE 3000
Enter fullscreen mode Exit fullscreen mode
The Node.js application listens on port 3000, so the Dockerfile declares:
EXPOSE 3000
Enter fullscreen mode Exit fullscreen mode
It is important to understand that EXPOSE does not publish the port to the host by itself.
It documents the port the application expects to use inside the container.
Host-to-container port publishing is configured when the container is started.
For example:
docker run -d -p 3000:3000 --name docker-node-container docker-node-app:1.0
Enter fullscreen mode Exit fullscreen mode
The mapping is:
Host                  Container
 3000       ───────►    3000
Enter fullscreen mode Exit fullscreen mode
CMD: Defining the Default Container Command
One of the most important Dockerfile instructions in this project was:
CMD ["node", "server.js"]
Enter fullscreen mode Exit fullscreen mode
CMD defines the default command executed when a container is started from the image.
In this case, Docker starts:
node server.js
Enter fullscreen mode Exit fullscreen mode
inside the container.
This is what launches the Node.js application.
Why CMD Matters
During the implementation, the application command was changed between:
CMD ["node", "server.js"]
Enter fullscreen mode Exit fullscreen mode
and:
CMD ["node", "app.js"]
Enter fullscreen mode Exit fullscreen mode
This demonstrated an important container behavior.
If the file referenced by CMD does not exist in the image, the container cannot successfully start the application.
This can result in a container that starts and immediately exits.
For example, if the Dockerfile contains:
CMD ["node", "app.js"]
Enter fullscreen mode Exit fullscreen mode
but the image does not contain:
/app/app.js
Enter fullscreen mode Exit fullscreen mode
Node.js cannot execute the requested entry point.
This is why examining container logs is an important troubleshooting step.
Building After a Dockerfile Change
A Docker image is a built artifact.
Changing the Dockerfile does not automatically modify an existing image.
After making changes, the image must be rebuilt:
docker build -t docker-node-app:2.0 .
Enter fullscreen mode Exit fullscreen mode
This creates a new image version containing the updated Dockerfile instructions.
The general workflow is:
Modify Dockerfile
       │
       ▼
docker build
       │
       ▼
New Image
       │
       ▼
docker run
       │
       ▼
Test Application
Enter fullscreen mode Exit fullscreen mode
This build-test cycle was repeated during the project to validate changes to the container configuration.
Inspecting Docker Images
After building an image, available images can be inspected with:
docker images
Enter fullscreen mode Exit fullscreen mode
This provides information such as:
- Repository
- Tag
- Image ID
- Creation time
- Image size
For example:
REPOSITORY       TAG       IMAGE ID       CREATED        SIZE
docker-node-app  1.0       abc123...      ...            ...
Enter fullscreen mode Exit fullscreen mode
Tags such as:
1.0
2.0
final
Enter fullscreen mode Exit fullscreen mode
can be used to distinguish different image versions during development and testing.
Running the Container
Once the image has been built, it can be started with:
docker run -d -p 3000:3000 \
  --name docker-node-container \
  docker-node-app:final
Enter fullscreen mode Exit fullscreen mode
The important options are:
| Option | Purpose |
|---|---|
-d |
Runs the container in detached mode |
-p 3000:3000 |
Maps host port 3000 to container port 3000 |
--name |
Assigns a name to the container |
docker-node-app:final |
Specifies the image to run |
The application can then be accessed from the host through:
http://localhost:3000
Enter fullscreen mode Exit fullscreen mode
Verifying a Running Container
After starting the container, its status can be checked with:
docker ps
Enter fullscreen mode Exit fullscreen mode
This displays currently running containers.
Typical information includes:
- Container ID
- Image
- Command
- Creation time
- Status
- Port mappings
- Container name
The port mapping should show that host port 3000 is forwarded to port 3000 inside the container.
Testing the Application
Once the container is running, the application can be accessed through a browser:
http://localhost:3000
Enter fullscreen mode Exit fullscreen mode
At this point, the request flow is:
Browser
   │
   │ localhost:3000
   ▼
Host Port 3000
   │
   │ Docker port mapping
   ▼
Container Port 3000
   │
   ▼
Node.js
   │
   ▼
server.js
   │
   ▼
HTTP Response
Enter fullscreen mode Exit fullscreen mode
This demonstrates the relationship between the host, container networking, and the application process.
Troubleshooting a Failed Container
Not every container starts successfully on the first attempt.
During the implementation, an invalid application entry point was used to demonstrate container troubleshooting.
A failed run can be identified using:
docker ps -a
Enter fullscreen mode Exit fullscreen mode
Unlike docker ps, the -a option also displays stopped containers.
This is particularly useful when a container starts and then exits immediately.
Using Docker Logs for Troubleshooting
When a container fails, logs are often the fastest way to determine why.
The logs can be viewed with:
docker logs docker-node-container
Enter fullscreen mode Exit fullscreen mode
For example, if the Dockerfile attempts to execute a file that does not exist:
CMD ["node", "app.js"]
Enter fullscreen mode Exit fullscreen mode
Node.js may report that it cannot find the specified module.
The important troubleshooting pattern is:
Container exits
      │
      ▼
docker ps -a
      │
      ▼
Identify exited container
      │
      ▼
docker logs <container>
      │
      ▼
Identify application/configuration error
      │
      ▼
Fix Dockerfile or application
      │
      ▼
Rebuild image
      │
      ▼
Run container again
Enter fullscreen mode Exit fullscreen mode
This workflow is useful well beyond simple Docker labs.
Stopping and Removing a Container
Once a container is no longer needed, it can be stopped and removed with:
docker stop docker-node-container && docker rm docker-node-container
Enter fullscreen mode Exit fullscreen mode
The first command:
docker stop docker-node-container
Enter fullscreen mode Exit fullscreen mode
stops the running container.
The second:
docker rm docker-node-container
Enter fullscreen mode Exit fullscreen mode
removes the stopped container.
The && operator ensures the second command runs only if the first command succeeds.
Rebuilding and Retesting
After correcting the Dockerfile, the image was rebuilt and the container started again.
A typical sequence is:
docker build -t docker-node-app:final .
Enter fullscreen mode Exit fullscreen mode
followed by:
docker run -d -p 3000:3000 \
  --name docker-node-container \
  docker-node-app:final
Enter fullscreen mode Exit fullscreen mode
Then:
docker ps
Enter fullscreen mode Exit fullscreen mode
and finally:
http://localhost:3000
Enter fullscreen mode Exit fullscreen mode
can be used to verify the result.
This build → run → inspect → troubleshoot → rebuild cycle is fundamental to working effectively with Dockerfiles.
Changing Application Output
The application response was also modified during testing.
For example:
res.end("Welcome to my Docker Node.js application!");
Enter fullscreen mode Exit fullscreen mode
After changing application source code, the image must be rebuilt if the source code is copied into the image during the build:
docker build -t docker-node-app:final .
Enter fullscreen mode Exit fullscreen mode
The updated image then needs to be used when starting a new container.
This demonstrates an important principle:
A running container does not automatically become a new image when the source code or Dockerfile changes.
The image must be rebuilt when the application contents packaged into it need to change.
Docker Build Cache
Docker builds are made up of layers.
For example:
FROM node:20-alpine

WORKDIR /app

COPY package*.json ./

RUN npm install

COPY . .

EXPOSE 3000

CMD ["node", "server.js"]
Enter fullscreen mode Exit fullscreen mode
Each instruction can contribute to the image's layer structure.
Docker can reuse unchanged layers during subsequent builds, which can significantly improve build performance.
This is one reason Dockerfiles are commonly structured to copy dependency definition files before copying the rest of the application source:
COPY package*.json ./
RUN npm install

COPY . .
Enter fullscreen mode Exit fullscreen mode
If only application source code changes, Docker may be able to reuse the dependency installation layer.
Dockerfile Best Practices
A production-oriented Dockerfile should be designed with efficiency, security, and reproducibility in mind.
1. Use an appropriate base image
Choose a maintained base image that provides only what the application needs.
For example:
FROM node:20-alpine
Enter fullscreen mode Exit fullscreen mode
A smaller base image can reduce the image footprint and attack surface, although compatibility should always be considered.
2. Keep the image focused
Only copy files required by the application.
A .dockerignore file can prevent unnecessary files from being included in the build context.
Example:
node_modules
.git
.env
npm-debug.log
Enter fullscreen mode Exit fullscreen mode
3. Take advantage of layer caching
Copy dependency files before application source code:
COPY package*.json ./
RUN npm install

COPY . .
Enter fullscreen mode Exit fullscreen mode
This can prevent unnecessary dependency reinstallation when only source files change.
4. Avoid embedding secrets
Do not place passwords, API keys, tokens, or other sensitive values directly into a Dockerfile.
Use appropriate runtime configuration and secrets-management mechanisms instead.
5. Run as a non-root user
Where appropriate, configure the container to run the application as a non-root user.
This reduces the impact of a potential application compromise.
6. Use explicit image tags
Rather than relying blindly on:
FROM node:latest
Enter fullscreen mode Exit fullscreen mode
consider using an explicit version:
FROM node:20-alpine
Enter fullscreen mode Exit fullscreen mode
This makes builds more predictable and reproducible.
Dockerfile Instructions at a Glance
| Instruction | Purpose |
|---|---|
FROM |
Defines the base image |
WORKDIR |
Sets the working directory |
COPY |
Copies files into the image |
RUN |
Executes commands during image build |
EXPOSE |
Documents a container port |
CMD |
Defines the default runtime command |
A useful distinction is:
RUN
└── Build time

CMD
└── Container runtime
Enter fullscreen mode Exit fullscreen mode
Understanding this difference is essential when diagnosing why a container behaves differently from the image build process.
Dockerfile Workflow
The complete workflow demonstrated in this project can be summarized as:
Application Source
       │
       ▼
   Dockerfile
       │
       │ docker build
       ▼
   Docker Image
       │
       │ docker images
       ▼
   Image Inspection
       │
       │ docker run
       ▼
 Docker Container
       │
       ├── docker ps
       │
       ├── Browser Test
       │
       └── docker logs
               │
               ▼
          Troubleshooting
               │
               ▼
        Modify Application
               │
               ▼
          Rebuild Image
               │
               ▼
        Run & Test Again
Enter fullscreen mode Exit fullscreen mode
This workflow provides a repeatable approach to packaging and validating containerized applications.
Dockerfile vs Docker Compose
Dockerfiles and Docker Compose solve different problems, but they complement each other.
| Dockerfile | Docker Compose |
|---|---|
| Defines how an image is built | Defines how multiple services run together |
| Creates a custom image | Orchestrates application services |
| Focuses on image construction | Focuses on service configuration |
| Uses Dockerfile instructions | Uses YAML configuration |
docker build |
docker compose up |
docker run starts the resulting image |
Compose manages the defined application stack |
A Dockerfile might create the image for an application:
Dockerfile
     │
     ▼
Application Image
Enter fullscreen mode Exit fullscreen mode
Docker Compose can then use that image as part of a larger application:
                Docker Compose
                     │
          ┌──────────┴──────────┐
          ▼                     ▼
    Application             Database
     Container              Container
Enter fullscreen mode Exit fullscreen mode
Understanding both technologies provides a stronger foundation for building and operating containerized applications.
Key Docker Commands
The primary commands used throughout the project include:
Build an image
docker build -t docker-node-app:final .
Enter fullscreen mode Exit fullscreen mode
List images
docker images
Enter fullscreen mode Exit fullscreen mode
Run a container
docker run -d -p 3000:3000 \
  --name docker-node-container \
  docker-node-app:final
Enter fullscreen mode Exit fullscreen mode
List running containers
docker ps
Enter fullscreen mode Exit fullscreen mode
List all containers
docker ps -a
Enter fullscreen mode Exit fullscreen mode
View container logs
docker logs docker-node-container
Enter fullscreen mode Exit fullscreen mode
Stop and remove a container
docker stop docker-node-container && docker rm docker-node-container
Enter fullscreen mode Exit fullscreen mode
Skills Demonstrated
This implementation demonstrates practical experience with:
- Dockerfile authoring
- Docker image creation
- Docker image tagging
- Docker build context
- Docker build layers and caching
- Node.js containerization
- Base image selection
- Working directory configuration
- Application file management with
COPY - Dependency installation with
RUN - Container port configuration
- Runtime commands with
CMD - Docker container lifecycle management
- Port mapping
- Container inspection
- Container log analysis
- Troubleshooting failed containers
- Image rebuild and validation workflows
- Linux command-line operations
- Git and GitHub
- Technical documentation
Conclusion
A Dockerfile provides the foundation for turning application source code into a portable, reproducible container image.
By defining the base runtime, working directory, application files, dependencies, exposed port, and startup command, the Dockerfile establishes how the application is packaged and executed.
The implementation also demonstrates that containerization is more than simply building an image. A reliable workflow includes:
Build
  ↓
Run
  ↓
Inspect
  ↓
Test
  ↓
Troubleshoot
  ↓
Rebuild
  ↓
Validate
Enter fullscreen mode Exit fullscreen mode
These concepts form a practical foundation for container-based application development and provide the building blocks for more advanced workflows involving Docker Compose, CI/CD pipelines, container registries, orchestration platforms, and cloud-native deployments.
Project Repository
The complete implementation, Dockerfile iterations, application files, and supporting screenshots are available on GitHub:
https://github.com/rahimahisah17/dockerfiles-lab
The repository provides the complete implementation and evidence of the build, run, troubleshooting, and validation process documented in this article.
Related Work
This Dockerfile implementation pairs naturally with a multi-container deployment workflow using Docker Compose.
Docker Compose can be used to take individually containerized applications and combine them with supporting services such as databases, caches, and other dependencies into a complete application stack.
0 Comments
Log in to join the conversation.No comments yet. Be the first to share your thoughts.