
When I first tried to understand JWT authentication, every article I found either assumed I already knew what a token was or buried the actual implementation under three pages of theory before showing a single line of code.
This guide skips that. We are going to build a working JWT authentication system in Node.js from scratch, understand what is actually happening at each step and end up with something you can use as the foundation for any project that needs user login.
By the end of this article you will have a complete auth flow - user registration, login, protected routes and token verification - with code you actually understand rather than code you copied and hoped for the best.
What JWT Actually Is Before We Touch Any Code
JWT stands for JSON Web Token. It is a way of proving to a server that you are who you claim to be without the server needing to check a database on every single request.
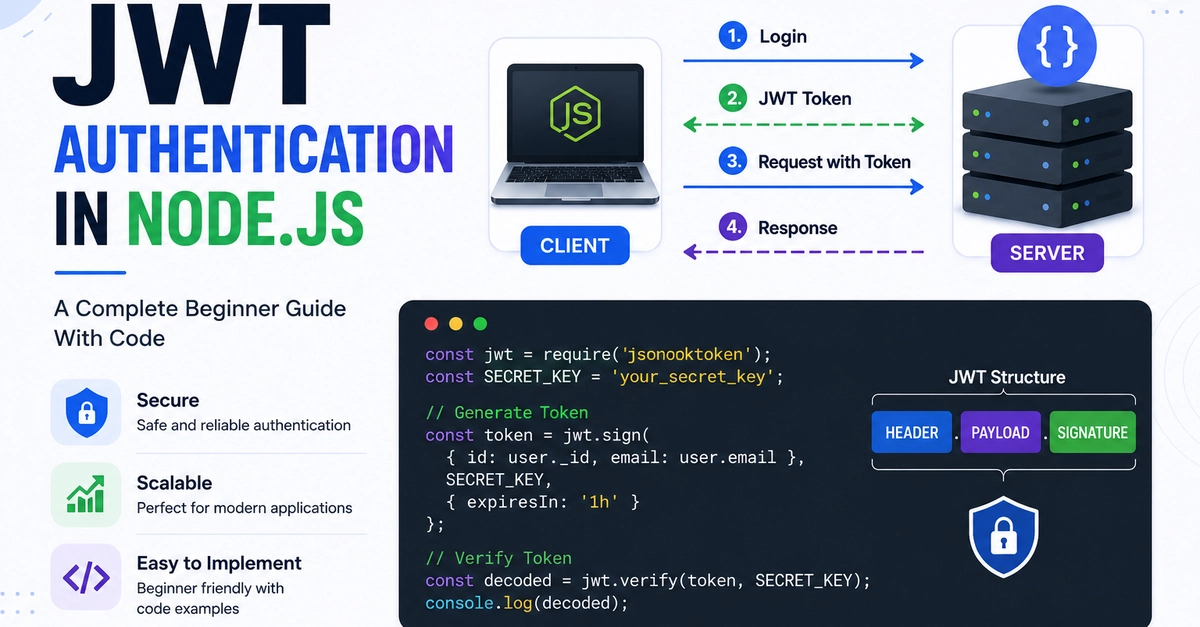
Here is the practical version. When a user logs in successfully, your server creates a token - a long string that contains encoded information about that user. The server sends that token to the client. The client stores it and sends it back with every subsequent request. The server reads the token, verifies it is legitimate and knows who is making the request without querying the database again.
The token has three parts separated by dots.
Header.payload.signature
The header says which algorithm was used. The payload contains the data you encoded - typically the user ID and role. The signature is a cryptographic proof that the token was created by your server and has not been tampered with.
The signature is what makes JWTs trustworthy. Anyone can decode the header and payload - they are just base64 encoded, not encrypted. But nobody can fake a valid signature without your secret key. This means you can trust the contents of a token if the signature is valid.
Project Setup
Create a new directory and initialize the project.
mkdir jwt-auth-demo

cd jwt-auth-demo

npm init -y
Install the packages we need.
npm install express mongoose jsonwebtoken bcryptjs dotenv

npm install --save-dev nodemon
Here is what each package does and why we need it specifically.
express - our web framework for handling routes and requests.
mongoose - connects to MongoDB and gives us a clean way to define user data structure.
jsonwebtoken - creates and verifies JWT tokens. This is the core of the entire authentication flow.
bcryptjs - hashes passwords before storing them. Never store plain text passwords. Ever.
dotenv - loads environment variables from a .env file so we never hardcode secrets in our code.
Update package.json to add a dev script.
"scripts": {

  "dev": "nodemon server.js",

  "start": "node server.js"

}
Create your environment file. Never commit this to GitHub.
# .env

PORT=5000

MONGODB_URI=mongodb://localhost:27017/jwt-auth-demo

JWT_SECRET=your-very-long-random-secret-key-here-make-it-at-least-32-characters

JWT_EXPIRE=7d
Project Structure
Keep things organized from the start. This structure scales cleanly as the project grows.
jwt-auth-demo/

├── config/

│   └── db.js

├── middleware/

│   └── auth.js

├── models/

│   └── User.js

├── routes/

│   └── auth.js

├── .env

├── .gitignore

└── server.js
Database Connection
// config/db.js
const mongoose = require('mongoose');
const connectDB = async () => {

  try {
const conn = await mongoose.connect(process.env.MONGODB_URI);MongoDB connected: ${conn.connection.host}
console.log();
} catch (error) {
console.error(Database connection error: ${error.message});
process.exit(1);
}
};
module.exports = connectDB;
The process.exit(1) is important. If your database connection fails on startup, the application should not continue running. Failing loudly is better than running silently in a broken state.
User Model
// models/User.js
const mongoose = require('mongoose');

const bcrypt = require('bcryptjs');
const userSchema = new mongoose.Schema({

  name: {

    type: String,

    required: [true, 'Name is required'],

    trim: true,

    maxlength: [50, 'Name cannot exceed 50 characters']

  },
email: {

    type: String,

    required: [true, 'Email is required'],

    unique: true,

    lowercase: true,

    match: [/^\S+@\S+\.\S+$/, 'Please provide a valid email']

  },
password: {

    type: String,

    required: [true, 'Password is required'],

    minlength: [6, 'Password must be at least 6 characters'],

    select: false  // Never return password in queries by default

  },
createdAt: {

    type: Date,

    default: Date.now

  }
});
// Hash password before saving
userSchema.pre('save', async function(next) {

  if (!this.isModified('password')) return next();
const salt = await bcrypt.genSalt(10);

  this.password = await bcrypt.hash(this.password, salt);

  next();

});
// Compare entered password with hashed password
userSchema.methods.comparePassword = async function(enteredPassword) {
return await bcrypt.compare(enteredPassword, this.password);

};
module.exports = mongoose.model('User', userSchema);
Two things worth understanding here specifically.
The select: false on the password field means Mongoose never returns the password when you query a user. You have to explicitly ask for it with .select('+password') when you need to verify a login. This protects against accidentally exposing passwords in API responses.
The pre('save') middleware runs before every save operation and hashes the password if it was modified. The isModified check prevents re-hashing an already-hashed password if you update other user fields.
Auth Routes - Registration and Login
// routes/auth.js
const express = require('express');

const jwt = require('jsonwebtoken');

const User = require('../models/User');

const router = express.Router();
// Helper function to generate token
const generateToken = (userId) => {

  return jwt.sign(

    { id: userId },

    process.env.JWT_SECRET,

    { expiresIn: process.env.JWT_EXPIRE }

  );

};
// @route POST /api/auth/register
// @desc Register a new user
// @access Public
router.post('/register', async (req, res) => {

  try {

    const { name, email, password } = req.body;
// Check if user already exists
const existingUser = await User.findOne({ email });

    if (existingUser) {

      return res.status(400).json({

        success: false,

        message: 'An account with this email already exists'

      });

    }
** // Create new user - password hashing happens automatically in the model**
const user = await User.create({ name, email, password });
** // Generate token**
const token = generateToken(user._id);
res.status(201).json({

      success: true,

      token,

      user: {
id: user._id,

        name: user.name,

        email: user.email

      }

    });
} catch (error) {

    res.status(500).json({
success: false,

      message: 'Server error during registration'

    });

  }

});
// @route   POST /api/auth/login

// @desc    Login user and return token

// @access  Public
router.post('/login', async (req, res) => {

  try {

    const { email, password } = req.body;
// Validate input
if (!email || !password) {

      return res.status(400).json({

        success: false,

        message: 'Please provide both email and password'

      });

    }
// Find user and explicitly include password for comparison
const user = await User.findOne({ email }).select('+password');
if (!user) {
return res.status(401).json({
success: false,
message: 'Invalid credentials'

      });
}
// Check password
const isMatch = await user.comparePassword(password);

    if (!isMatch) {
return res.status(401).json({

        success: false,
message: 'Invalid credentials'

      });

    }
const token = generateToken(user._id);
res.status(200).json({
success: true,

      token,

      user: {
id: user._id,

        name: user.name,

        email: user.email
}

    });
} catch (error) {

    res.status(500).json({
success: false,

      message: 'Server error during login'
});

  }

});
module.exports = router;
Notice that both wrong email and wrong password return the same error message - "Invalid credentials." This is intentional. Telling a user specifically whether the email does not exist or the password is wrong gives attackers useful information for brute-force attacks. Generic error messages protect your users.
Auth Middleware - Protecting Routes
This is the piece that makes JWT authentication actually useful. Any route that needs a logged-in user runs through this middleware first.
// middleware/auth.js
const jwt = require('jsonwebtoken');
const User = require('../models/User');
const protect = async (req, res, next) => {
let token;
// Check for Bearer token in Authorization header
if (
req.headers.authorization &&
req.headers.authorization.startsWith('Bearer')
){
token = req.headers.authorization.split(' ')[1];

  }
if (!token) {
return res.status(401).json({
success: false,
message: 'Access denied. No token provided.'
});
}
try {
// Verify token - this throws if invalid or expired
const decoded = jwt.verify(token, process.env.JWT_SECRET);
// Attach user to request object
req.user = await User.findById(decoded.id);
if (!req.user) {
return res.status(401).json({
success: false,
message: 'User belonging to this token no longer exists'

      });

    }
next();
} catch (error) {
return res.status(401).json({
success: false,
message: 'Token is invalid or has expired'

    });
}

};
module.exports = { protect };
The check for whether the user still exists is easy to skip but genuinely important. If you delete a user account, their old token is still technically valid until it expires. This check handles that case by verifying the user actually exists in the database before granting access.
Main Server File
// server.js
require('dotenv').config();

const express = require('express');

const connectDB = require('./config/db');

const { protect } = require('./middleware/auth');

const authRoutes = require('./routes/auth');
const app = express();
// Connect to database
connectDB();
// Parse JSON bodies
app.use(express.json());
// Auth routes — public
app.use('/api/auth', authRoutes);
// Example protected route
app.get('/api/profile', protect, async (req, res) => {

  res.status(200).json({

    success: true,

    user: {

      id: req.user._id,

      name: req.user.name,

      email: req.user.email,

      createdAt: req.user.createdAt

    }

  });

});
// Basic health check
app.get('/api/health', (req, res) => {

  res.status(200).json({ status: 'Server is running' });

});
const PORT = process.env.PORT || 5000;

app.listen(PORT, () => {
console.log(Server running on port ${PORT});
});
Testing the Complete Flow
Start your server.
npm run dev
Register a new user
curl -X POST http://localhost:5000/api/auth/register \

  -H "Content-Type: application/json" \

  -d '{"name":"Test User","email":"[email protected]","password":"password123"}'
Login
curl -X POST http://localhost:5000/api/auth/login \

  -H "Content-Type: application/json" \

  -d '{"email":"[email protected]","password":"password123"}'
Copy the token from the login response.
Access protected route
curl -X GET http://localhost:5000/api/profile \

  -H "Authorization: Bearer YOUR_TOKEN_HERE"
Try accessing protected route without token
curl -X GET http://localhost:5000/api/profile
You should get a 401 response immediately.
Common Mistakes to Avoid
Storing tokens in localStorage - localStorage is accessible through JavaScript which means XSS attacks can steal tokens. Use httpOnly cookies for production applications where security matters.
Using short or predictable JWT secrets - Your secret key should be long, random and stored only in environment variables. A weak secret makes your signatures forgeable.
Not handling token expiration gracefully - Always catch TokenExpiredError specifically so you can return a helpful error to the client that tells them to log in again rather than a generic server error.
Putting sensitive data in the payload - The payload is encoded not encrypted. Anyone can decode it. Only put what you need - typically just the user ID. Query the database for anything sensitive.
What to Build Next
This gives you the foundation. Here is where to take it from here.
Add refresh tokens so users do not get logged out every time their access token expires. Add role-based authorization so different users can access different routes. Add email verification before allowing login. Add rate limiting to your auth routes to prevent brute-force attacks.
Each of these builds directly on what we covered here.
0 Comments
Log in to join the conversation.No comments yet. Be the first to share your thoughts.